 A great way to improve your passing skills (also called ball striking) is to practice with a wall or a rebound net. Link: kick-back / rebound net equipment
When you pass into a wall or rebound net, it passes the ball right back to you, so you can work on passing (and receiving) all by yourself without having to chase the ball after every pass.
What if you don’t have a wall or rebound net? You can use a bench turned on its side. Or have a friend, sister or brother, mom or dad act as your partner. If your partner isn’t good at kicking a soccer ball, she can use her hands to roll the ball to you. (Or you can buy a soft soccer ball designed for inside-the-house play and pass off an indoor wall.)
Don’t forget to work both feet!
Basic inside-of-the-foot passing:
You can kick a ball with lots of different surfaces: inside of the foot, outside of the foot, laces, toes, heel. The inside of the foot is a large surface, and the curved shape fits the curve of the soccer ball. This surface gives you the most accuracy. The inside of the foot is an excellent choice for short-to-medium distance passes and shots.
This skill looks easy. It isn’t! It doesn’t become easy until a player has lots and lots of practice to get all of the moving parts working together. We recommend practicing with a wall or a rebounder to get lots of repetitions. But some players may get bored without a partner. Soccer golf, passing marbles and Slam! are fun partner ball striking games.
Keys to success:
There are three stages you’ll go through when striking a ball: your approach to the ball, the kick itself, and the follow-through. Young players need lots and lots of practice to get all the moving parts working together.
Stage 1: your approach to the ball
- Face your target.
-
Prepare the ball by getting it 1-2 steps out from your feet, ahead at a slight angle. If the ball is too close to you, use your foot to roll or push the ball forward. We call this a “prep” touch. If the ball isn’t where you need it to be, take a prep touch instead of backing away from the ball.
- If you will strike the ball with your left foot, prep the ball slightly to the left (a little before 11 o’clock if you think of a clock analogy).
- If you will strike the ball with your right foot, prep the ball slightly to the right (a little past 1 o’clock if you think of a clock analogy).
- Take a glance at your target, and then focus your eyes back on the ball.
- Step to the ball. You’ll take a small step with your kicking foot, and then a longer “power step” with your plant foot (also called your pointer foot, non-kicking foot, or standing foot). As you improve your ball striking, your power step will turn into a power hop.
-
Place your plant foot next to the ball, about 6-10 inches away. (The ideal distance varies based on the player’s size.) Point your toes at your target. Bend the knee of your plant foot leg. This will help you stay balanced. Your head should be over your chest (with eyes focused down on the ball), not leaning back.
Common mistakes during stage 1 (your approach):
There are a lot of things that can go wrong during the approach stage. Mistakes usually result in a lack of accuracy and / or a loss of power.
- Trying to strike a ball that’s stuck under your body. Get the ball 1-2 steps out from your body.
- Trying to strike a ball that’s directly in front of you. Prep the ball ahead at a slight angle, not straight ahead.
- No power step to the ball. Step to the ball, not behind the ball.
- Taking two or more giant steps to the ball. If you’re several steps away from the ball, take short, quick steps, and then finish with one final longer power step.
- Pointing your plant foot toes away from your target.
- Having stiff knees when you strike the ball. Both legs should have bent knees.
- Stepping to the ball, then stopping all body movement before swinging your leg. Your movements need to flow like water and not stop like a robot.
- Plant foot too far behind the ball. Make sure your power step gets your plant foot next to the ball, not behind it.
Stage 2: the kick
-
As your plant foot steps down, bring your kicking leg back so you can be in position to swing your leg.
- Swing your kicking leg forward toward the ball. This should be the start of a smooth “arc” motion. (The motion has the shape of a smile.)
- Strike the middle of the ball with the inside of your foot. Your knee should be bent, your heel should be just off the ground, and your toes should be pointed up and out to the side (with your ankle “locked” so your foot doesn’t flop around).
- When you strike the ball, your head should be over your chest (with eyes focused down on the ball), not leaning back. Your hips and shoulders should be “square” to your target.
- Your leg swing should follow a smooth arc — think of the shape of a smile.
Common mistakes during stage 2 (the kick):
There are a lot of things that can go wrong during the kick. Mistakes usually result in a lack of accuracy and / or a loss of power.
- Hips not square to your target the moment you strike the ball.
- Knees stiff instead of bent.
- Eyes not on the ball when you strike it.
- Striking the bottom of the ball, or pointing your toes down. The ball will likely go up in the air, which makes it hard for a teammate to control, or easy for a goalkeeper to catch.
- Floppy foot instead of locked ankle.
- Kicking foot toes pointed slightly forward instead of out to the side.
- Head in front of the ball. You’ll likely kick down on the ball, not through it, and you’ll lose power.
- Kicking down on the ball instead of through it. The ball will bobble instead of rolling smoothly, and you’ll lose power.
- Trying to “kill” the ball, instead of making a smooth leg swing. This causes a jerky motion and results in a lack of accuracy. If your body parts are working together, you’ll get plenty of power with a smooth leg swing.
Stage 3: the follow-through
After you strike the ball, your foot should “follow through” the ball toward your target, and stay in the air for a moment before stepping down. (This finishes the “smile” shape we mentioned earlier.) The ball should roll (with topspin) toward your target.
Common mistakes during stage 3 (the follow-through):
- No follow-through or a “chop” (where your kicking foot goes straight into the ground). The ball won’t roll properly and it will be hard for a teammate to judge the speed of your pass.
- Hooking your follow-through, where your kicking foot crosses over past your plant foot. You’ll usually miss your target (missing in the direction of the hook).
2-touch:
Pass the ball off the wall, then as the ball comes back to you, use your first touch to control it, and then pass the ball back into the wall with your second touch. This adds an emphasis on receiving the ball properly.
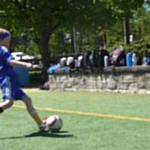
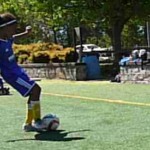
Kids demo #1:
Kids demo #2:
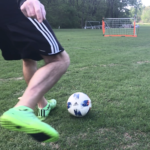
Coach demo #1:
Coach demo #2:
- Pass the ball into the wall with the inside of your foot.
- As the ball comes back to you, control it with your first touch — in front at a slight angle. The key is to get a good first touch out from your feet — in front at a slight angle — so you can step to the ball and pass it with your second touch. You can receive with one foot and pass with the other (demo #1), or receive and pass with the same foot (demo #2). Keys to receiving:
- Get your body behind the ball (no ballet stretches or sideways body position).
- Place your plant foot next to the ball, with your knee bent to stay balanced.
- Cushion the ball with the inside of your receiving foot, with heel low, toes up and out, knee bent and head over your chest to stay balanced. If you do it right, you’ll control the ball a step away in front at a slight angle.
- Pass the ball back into the wall with your second touch and repeat. To make it more challenging, create a small target area of the wall, and see how many times you can hit the target in 1 minute.
1-touch:
Kids demo:
Coach demo:
Demo using a bench:
- Pass the ball into the wall, then pass it back again on your next touch. You don’t get an extra touch to control the ball, so you’ll need to stay on your toes and take quick steps to get your body behind the ball.
- Try to keep the ball on the ground by hitting it with the inside of your foot, with your heel low and toes pointed out and up.
- Start by using whichever foot is easiest, then try alternating feet (right, left, right, left, etc.), then try “second best foot only.” Alternating feet and “second best foot only” will help you work on your aim and help you improve your second best foot.
- Contest: How many 1-touch passes can you get in a row without messing up? Or how many can you get in 1 minute?
- To make it more challenging, create a small target area of the wall, and see how many times you can hit the target in 1 minute.
Fun games that develop passing skills:
There are a bunch of fun games you can play to help improve your passing skills: Slam!, passing marbles, soccer golf, the “gates” game and the “napkin rings” game. Check our Passing and Receiving Games page for more details.
Pass & shoot (finesse & power) – intermediate:
In this activity, you combine passing, shooting and receiving. If you can consistently make good ground ball passes with the inside of your foot, you’re ready for this one. (If not, keep working on the basic 2-touch and 1-touch wall ball activities above.)
Kids demo #1:
Kids demo #2:
Coach demo:
- Pass the ball into the wall with the inside of your foot. Make sure it’s a ground-ball pass. This is the “finesse” part. The wall should send you a “dream ball” pass.
- Strike the dream ball 1st time with your laces. This is the “power” part. Since you’re striking the ball harder, the wall will send a hard pass back to you. Keys to a good laces drive:
- Approach the ball at a slight angle, taking short quick steps until a final longer power stride.
- Place your plant foot next to the ball (not too close, or you may kick the ground), pointed toward your target.
- Strike through the ball with the top (laces) part of your foot, with ankle locked and toes pointed down.
- Follow through toward your target; (advanced: when you get the hang of it, follow through into the air and land on your kicking foot). If the ball comes out hard and low with no backspin, you’ve done it right. If you get backspin, it means your toes are coming up before or when you strike the ball.
- You won’t have much time to react to the return pass, so stay on your toes and take quick steps to get your body behind the ball.
- Receive the ball with the inside of your foot. Can you make a soft, cushioned first touch on the hard return pass? The perfect first touch will place the ball about a step or two in front at a slight angle.
- Repeat the “pass (finesse), then shoot (power)” cycle. To make it more challenging, create a small target area of the wall, and see how many times you can hit the target in 1 minute.


